Thursday 6 June 2013

BEGINNER PROJECTS : KIDS SKIRTS


UPDATE MAY 2014:
 I have been busy making many skirts. Here are a few:  SKIRT MANIA


These are my first set of children's clothes I have made and whilst they may not be perfect I am proud of them. Thankfully my niece gave me a few minutes to model them for me.

It is good practise for a beginner sewist to start with simple skirts. There are tonnes of them on the internet, so just pic your choice. I especially liked  A SIMPLE SKIRT by MADE.

First up is a royal blue matte linen skirt with a floral polyster trim. The ribbon at the waist is a faux / fake drawstring, but helps the child to determine where is the front and back. This is a size 3T.

This elastic waist skirt is made from matte linen, with a polyester trim.


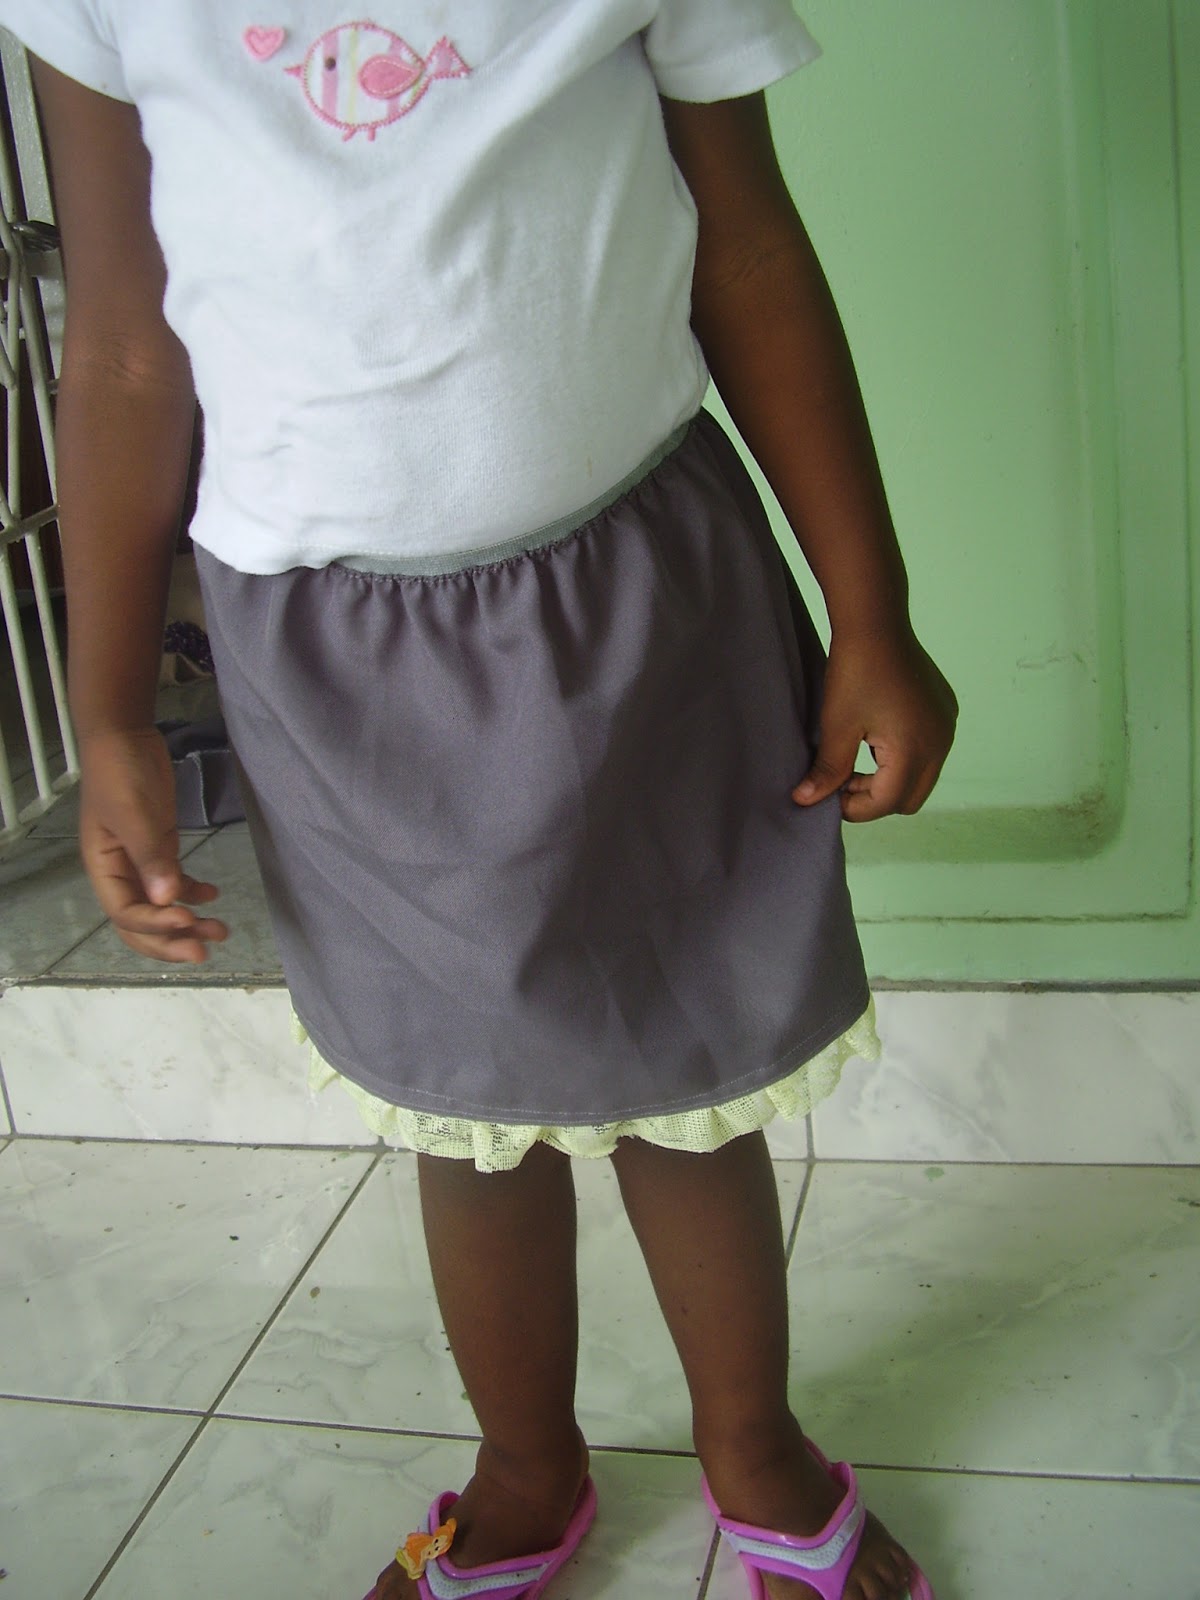
I also made a grey coloured skirt from matte linen as well. I made an exposed elastic waist and my first applique flower held on by a button. The edge of the skirt was serged but I think I will hem it up.  This skirt is also a size 3T. For this skirt I chose The "Make it and Love It" tutorial

Next I made another skirt out of the grey matte linen with a fabric flower held on by a button.


Next, I made a floral skirt - same thing different fabric:

The above skirt is a simple one with an elastic waist. I also added a piece of lace to the bottom as frill. This is the same fabric (matte linen in grey) 


Tuesday 4 June 2013

GIRLS TOP TUTORIAL : THE "LOVE ME ORANGE TOP "

Though not perfect I am really proud of my latest achievement. It is as simple as breathing but it took me two hours (lol!)
Anyway let me share it with you:

I made it on Saturday June 1 2013.
The fabric used is cotton (we call it dacron and cotton) :

I got the two pieces of fabric (show below)  from a seamstress who obviously decided to abandon the project.

I decided to make a size  3T top.
My measurements used were :
CHEST 21
my aim is my top to have a finished length (including straps) of 15 1/2 inches

The fabric is actually a top gone bad. Its size is about 12 inches long starting from the cut neckline on the orange piece and about 12 inches wide) .


So, the first thing I did was even up my squares. I ended up with 12 x 12 squares
Then,  I sewed cut a piece of white about 2W x 24L .


Then, I sewed the orange pieces together and then stitched the white to the bottom.


Next, I folded the white to the wrong side of the orange fabric to cover the raw edges of the orange piece. So it should look like this when done.This added another 1 1/2 inches to the length.


I then stitched a one inch tube at the top of the blouse to fit in the elastic. remember to leave out a gap to insert the elastic through.
I then made straps one inch wide by 10 inches long when done. You can adjust the strap length so that it is
 3 -4 inches when stitched on.
I decided to be a little creative and add the strap on the outside of the top instead. I sewed a box just below the stitch line where i made the tube for the elastic. The straps were sewn 2 1/2 inches in from the border and one inch down from the top as demonstrated below. for the straps on the back I sewed them inside as normal(picture not show yet)


Sew the other side of the top together . You should now have this (front view)
Back view :

Cut the elastic one inch shorter than the chest measurement (i.e 20 inches) and insert elastic through the tube . Stitch the ends together and close your casing .


I recently started to learn how to applique - please ignore the wonky heart. But what I did was draw a heart shape on the paper side of the iron on interfacing then I placed my fabric on the shiny side. ironed it . Then I cut it out and stitched it on my top with a straight stitch.

And that's it!
 I don't have any children to fit it on to give you a better idea but I hope you have a little one to make one for and let me see how it looks.


Thursday 18 April 2013

DIY TRAVEL PIN CUSHION


I needed a container to hold my pins when I travel. So I thought, what would prevent my pins from being bent, hold my seam ripper and sewing needles.

 I came up with this - 
 

I don’t have step by step pictures, but it is fairly easy.

What you will need:

-An old butter dish
- A pre-purchased pin cushion - OR NOT !! .
- A magnet ( I got mine from an old button used during a work sales event. (see picture of it at end of tutorial ) It’s a bit rusty but hey – it still works!
- Scrap piece of fabric to wrap the butter dish
- A glue gun to attach the fabric and the magnet to the butter dish


Steps to Success:
  1. Measure and glue fabric to the outside of the dish as well as on top of the cover. I did not bother to cover the inside of this dish but you can if you wish.
  2. Glue the magnet inside the dish close to the side of the container to ensure you have enough space to attach your pin cushion.
  3. You can either make or buy a pin cushion. I made mine using steel wool scouring pad, batting , a strong cord and fabric. Be creative it wont be moved for anyone to see and criticise it anyway! If you are clueless how to make one, there are numerous tutorials out there.
  4. Add glue to the bottom of the pincushion and stick it to the bottom of the butter dish beside the magnet..
  5. Insert your pins, and add your needles and seam ripper to the magnet
  6. Ta Da! Done. Took me 30 minutes because I had no idea what I was doing.
Happy crafting!

Picture of my magnet (eeeew):


My gorgeous container with lid ( ignore the frayed edges I have not yet invested in a fray stopper):


DIY MOUSE PAD


Materials used:

-          foam board (mine is 8 x 8 inches)
-          Glue ( I used shoemaker glue because that was all I had)
-          Fabric scrap : 
*TOP FABRIC cut 10 x 10 inches  (ensure it is not too white because depending on the type of mouse you have it may not be able to “read on the white fabric and also you don’t want something that will get dirty too quickly. 
* For your  BOTTOM FABRIC cut 9 x 9 inches
-          Wadding (cut 9 x 9 inches)

Steps to Success:
  1. Cut your wadding just about 1/2 inch bigger than your foam board
  2. Squirt or paint glue onto your foam board
  3. Stick wadding on top of foam board
  4. Wrap TOP FABRIC around foam board and keep in place with large paper clips or something to hold it down while you glue around the edges.
  5. Apply glue to the edges of the BOTTOM FABRIC and carefully glue in place on the bottom of the mouse pad -  make it neat
  6. Done!