Hi Everyone,
Today I am sharing a new pattern with you.
It is the Raye Raglan Top and dress by Stitch Upon a Time.
This pattern comes with several sleeves, necklines, top and dress lengths that you can mix and match.
Today I am going to show you how I do a swayback adjustment on my Raye top by SUAT.
Now you may be wondering what is a sway back adjustment and I will explain it with the photo below.
 |
| Thanks to tester Emily for allowing me to use her photo as an example. |
In this photo, you will notice that the fabric has pooled above the hip and in the waist area.
Now a swayback is basically that curve in the small of your back and it causes the fabric to pool or sit in that curved area. This shape may be due to posture or just be naturally how you are shaped.
This sometimes causes your clothing not to sit nicely and results in the fabric pooling or folding in the small of your back.
For this reason, I tend to always add a centre back seam to dresses and tops that do not already have one so that I can perfect the fit to my body.
Sometimes the dress already has a centre back seam and I still need to curve that seam a bit more to get a proper fit.
This pattern adjustment is quite simple and you will be happy with the outcome.
METHODS OF ADJUSTING FOR SWAYBACK :
Method 1: You can sew up a muslin and then pinch out the extra fabric and measure it to see how much your adjustment needs to be. Once you have found out how much you will need to adjust, you can follow the adjustment steps below to make the adjustment.
Method 2: Measuring your body and adjusting the pattern - You could also be like me and take a shortcut route and measure your body, but you will need the help of someone else to take the measurements for you. I will be using this illustration to guide the measurement process. To take the measurements you will need :
- long hard ruler
- measurement tape
- paper and pen to write down your measurements
BLUE LINE - this represents the long (hard ruler )- the person who is measuring you will place the ruler along your back. (No measurement will be recorded for this step).
RED LINE - Your side waist measurement - measure from right above the bust (i.e where your armpit ends) to your natural waist. It is recommended to tie a string or piece of elastic around your waist to be sure where your natural waist falls. The elastic or string will usually settle at the narrowest part of your waist.
You could also lean over sideways and mark that crease at your side seam to find your natural waist.
Record this measurement from the armpit to the natural waist.
GREEN LINE - locate where your back curves or "sinks in" the most. This could be your natural waist or where your side seam ends. Once you determine this section on your body, measure out to the blue line. In other words, you are finding the distance between your back and the blue line. This figure is the amount you will be adjusting your pattern piece so be sure to measure accurately.
Record this measurement.
In my case, the green line is 2" and my side seam is 9".
Now let us go to the pattern pieces.
ADJUSTING THE BACK BODICE PATTERN
Take your back pattern piece and measure from the underarm area to the length of your side waist measurement. Square across on your pattern piece at the side seam measurement.
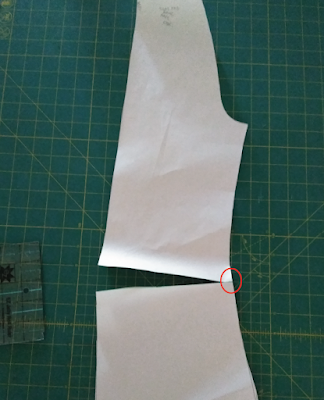
Next cut alongside the waist measurement line (red line) leaving about a 1/2" left so that the pattern piece will stay together i.e you are not cutting all the way through the paper.
Divide the green line measurement (i.e the amount of your sway back measurement) into 2. In my example 2 / 2 = 1". I will mark 1" above and below the cut pattern piece.
Overlap your 1" mark at the top so that the marked 1" lines sit on top of each other.
Tape or glue your paper together.
Because you are now cutting two back pieces, you will need to add back the seam allowance to back bodice pieces. You can either add it to the paper pattern or like me just cut out the extra amount while you are cutting out the back pieces.
Pin your back bodice pieces together and sew.
Continue with the shirt or dress construction as given in the pattern instructions.
And one of the features I really love about this pattern is the gathered raglan sleeve.


